How to Unlock the Power of Lightroom's Cropping Tool
Lightroom is my preferred tool for experimenting with various cropping possibilities. It offers a rich selection of nine different overlays, encompassing diverse options for both beginners and professionals. These include four unique grid patterns, a centering feature, diagonals, specific dimensions tailored for printing, the elegant Fibonacci spiral, and triangle-based grids. Unlike Lightroom, Photoshop lacks some of these advanced options, making Lightroom the more versatile choice for these particular tasks.

When I first began using Lightroom, I found myself overwhelmed by the multitude of menus and options, struggling to remember where to find various tools and features. One technique I picked up early on and use frequently involves the cropping overlays, and I'd like to share this helpful tip with you.
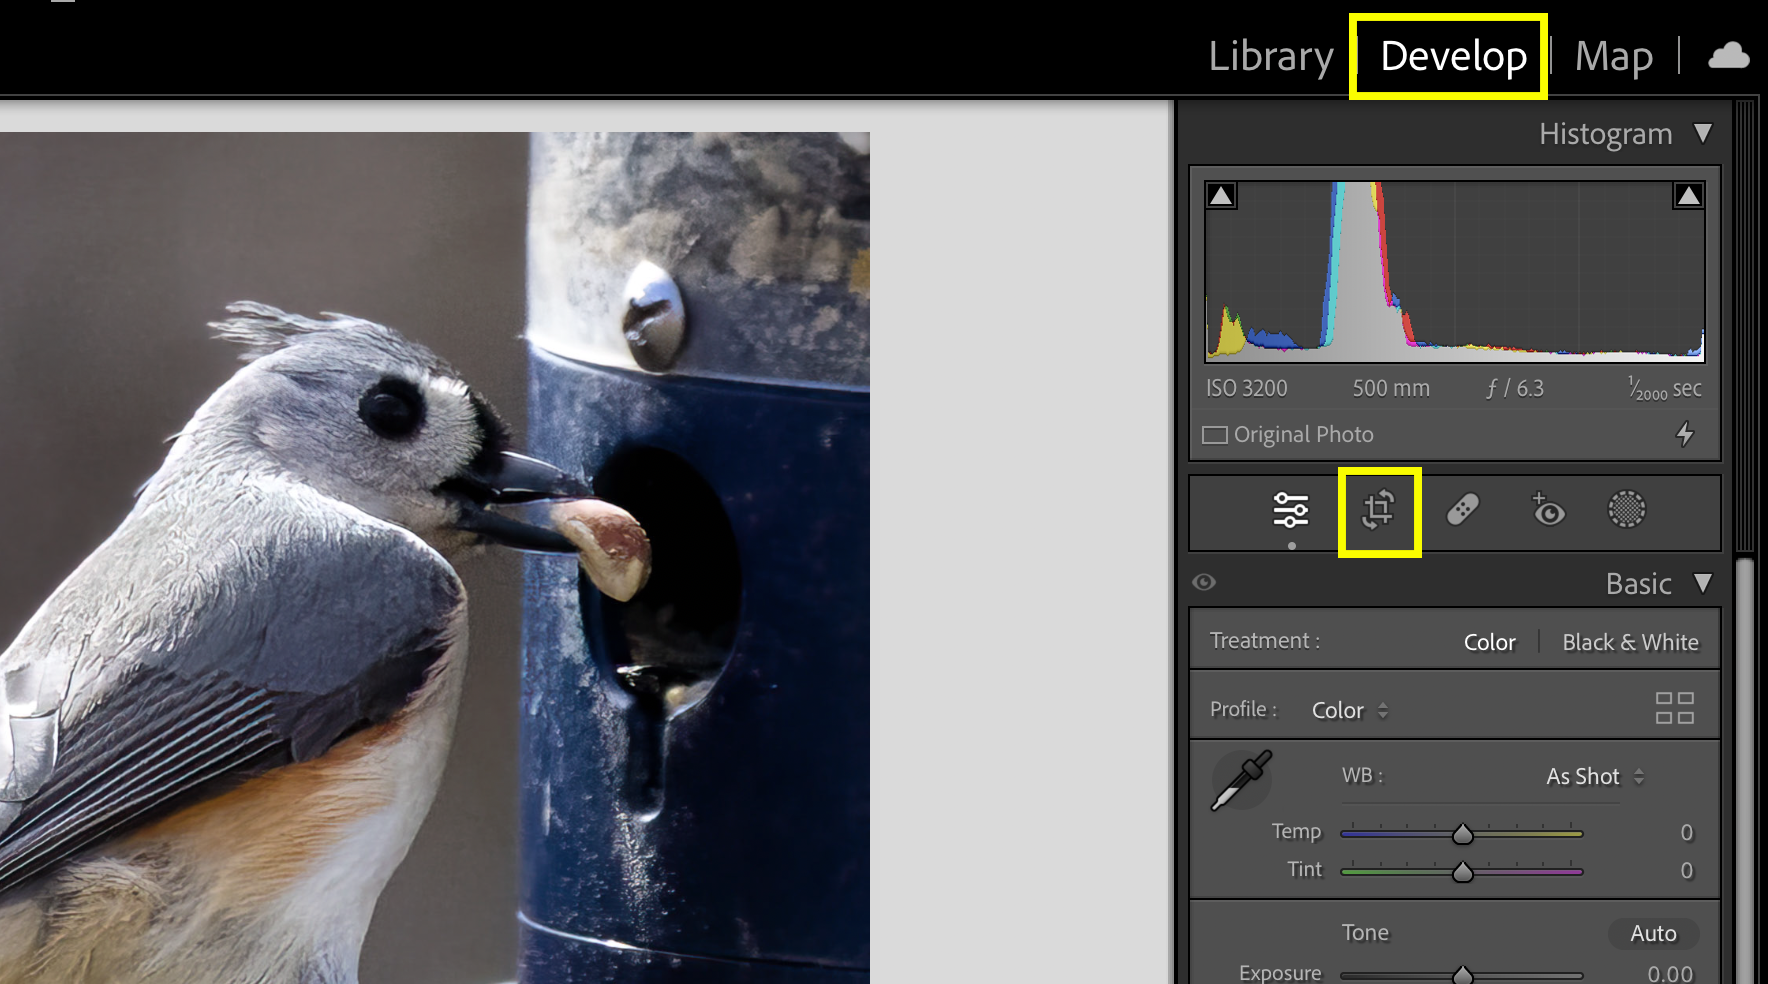
Finding these grids may initially seem a bit complex, but I'll guide you through it, making the process more intuitive. Start by navigating to the "Develop" Module, as cropping falls under the editing umbrella. You can locate "Develop" at the top right corner of the screen.
Once you're in the "Develop" Module, open a photo to view it in full. Then, click on the "cropping tool." Below, the Develop and Cropping Tool are highlighted with yellow boxes for easy identification. From here, you have the power to explore ALL NINE different cropping overlays with ease. Simply press the letter "O" on your keyboard, and you can cycle through each overlay. This handy shortcut will make your editing experience in Lightroom more efficient and enjoyable.